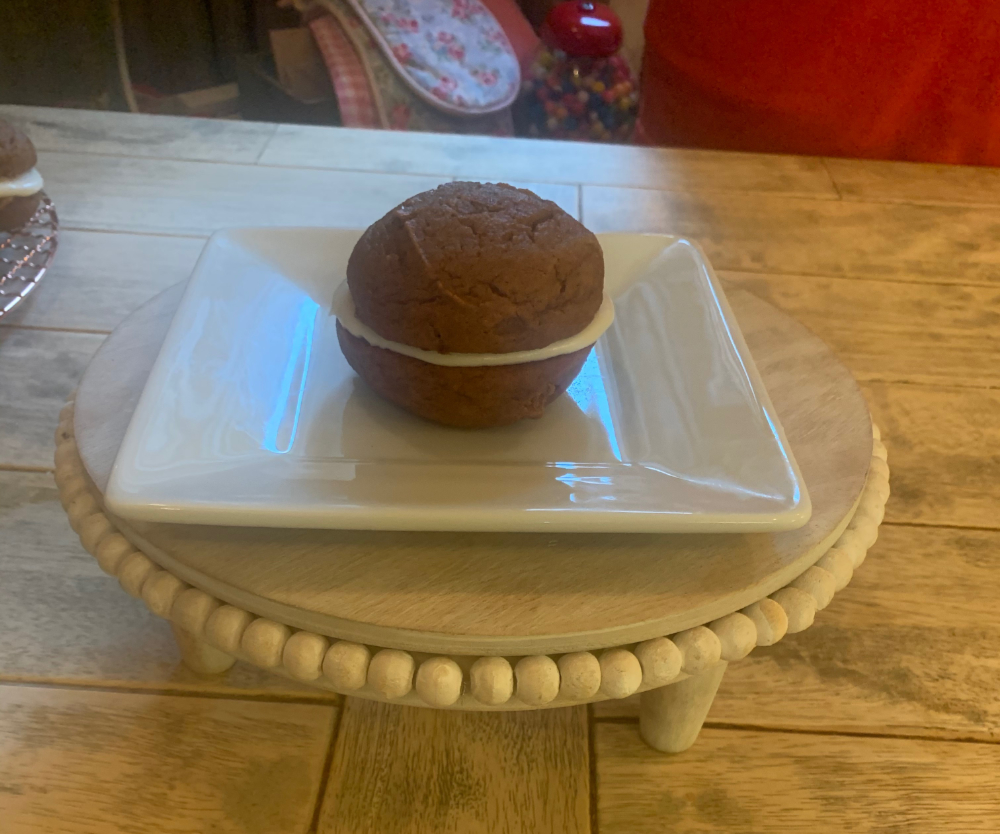
A fall twist on the classic Whoopie pie. They are soft, light and full of cozy fall flavors. Let the aroma of cinnamon, ginger and nutmeg fill your house with delight.
So, we’re fresh off of trick-or-treating and my niece is in full Christmas mode. She hopped right over Thanksgiving and went straight to the mother of all holidays. I think it’s about the presents, but she swears differently. According to her, she can’t wait to pick out our Christmas tree and bake gingerbread cookies. But me on the other hand, I’m in no rush. The time is flying by fast enough already. Plus, I have one more pumpkin recipe that I’d like to get off my chest. So with that being said, let’s dig into this delicious pumpkin Whoopie pie recipe before fall baking season comes to an end.
The scoop
I’ve been dying to make these adorable little sandwich cookies for quite some time now. But for one reason or another I never got around to doing so. This soft cake-like cookie has always been a mystery to me. Is it a cookie, cake, or pie? After doing a little research, I discovered it is neither a cookie or a pie. But more like two soft rounds of cake with cream filling sandwiched in between. They can be made in a variety of different flavors too. Chocolate, gingerbread, red velvet, s’mores and more. But because it is fall, i’m making a pumpkin version of this tasty little treat. They are super easy to make and taste oh-so delicious too. The aroma of cinnamon, ginger and nutmeg will fill your house with delight. Greediness got the best of me and I ate one while it was still warm. Although it was delicious, I still felt like it was missing a little something something. So I folded a cup of chopped walnuts into the cream cheese filling to give it a slight crunch. Can we all say irresistible! This small alteration took in already fabulous recipe to the next level. They make a great snack but something this cute and delicious is meant to be shared. Bake and take these to your next fall get together and watch the compliments pour in. The full recipe with pics is listed below. Go bake your self happy!
Find the original recipe at: BrownEyedBaker.com
INGREDIENTS:
- 3 cups all-purpose flour
- 2 tablespoons cinnamon
- 1 teaspoon baking powder
- 1 teaspoon baking soda
- 1 teaspoon salt
- 1 teaspoon ground ginger
- ½ teaspoon ground nutmeg
- 1 cup granulated sugar
- 1 cup dark brown sugar
- 1 cup canola or vegetable oil
- 3 cups chilled pumpkin puree (canned pumpkin)
- 2 eggs
- 1 teaspoon vanilla extract
FOR THE MAPLE-CREAM CHEESE FILLING:
- 3 cups powdered sugar
- 8 ounces cream cheese (at room temperature)
- 4 ounces unsalted butter, at room temperature ((½ cup ))
- 3 tablespoons maple syrup
- 1 teaspoon vanilla extract
DIRECTIONS:
- Preheat oven to 350 degrees F. Line baking sheets with parchment paper or a silicone baking mat.
- In a large bowl, whisk together the flour, cinnamon, baking powder, baking soda, salt, ginger and nutmeg. Set aside.
- In a separate bowl, whisk the granulated sugar, the dark brown sugar, and the oil together. Add the pumpkin puree and whisk to combine thoroughly. Add the eggs and vanilla and whisk until combined.
- Gradually add the flour mixture to the pumpkin mixture and whisk until completely combined.
- Use a small cookie scoop or a large spoon to drop a rounded, heaping tablespoon of the dough onto the prepared baking sheets, about 1 inch apart.
- Bake for 10 to 12 minutes, making sure that the cookies are just starting to crack on top and a toothpick inserted into the center of a cookie comes out clean. The cookies should be firm when touched. Remove from the oven and let the cookies cool completely on a cooling rack.
- To make the filling, beat the butter on medium speed until smooth with no visible lumps, about 3 minutes. Add the cream cheese and beat until smooth and combined, about 2 minutes. Add the powdered sugar a little at a time, then add the maple syrup and vanilla and beat until smooth.
- To assemble the whoopie pies: Turn half of the cooled cookies upside down. Pipe or spoon the filling (about a tablespoon) onto that half. Place another cookie, flat side down, on top of the filling. Press down slightly so that the filling spread to the edges of the cookie. Repeat until all the cookies are used. Put the whoopie pies in the refrigerator for about 30 minutes to firm before serving.


